One problem is lighting a specimen so that the exposure is consistent over the sequence of shots. Since so much magnification is involved, camera shake is also an ever-present problem. Eelectronic flash is an attractive option because it gives bright, consistent lighting and the very brief duration of the flash helps eliminate camera shake. The trouble is that it tends to be strongly directional, so some areas end up in deep shadow whilst other areas, particularly if they are shiny, tend to have strong and burnt-out reflections. I have therefore been experimenting with ways of using flash whilst acheiving diffuse, omni-directional lighting.

The diffuser set-up is based on a white, plastic bucket of the sort you buy things like filler in DIY shops. I cut a slot to accomodate the focussing rack of the microscope so that the bucket is about central under the microscope barrel. Oppisite this, I cut a rectangular hole for the flash gun and drilled a couple of holes (15mm) for the fibre optic lights. I still need the ordinary lighting to position the specimen even if the photos are largely illuminated using flash.

Opposite the hole for the flash, I covered the inside wall with aluminium foil. I also drilled a couple of small (5mm) holes either side of the tub just above the base. Through these, I threaded a wire pushed through a piece of plastazote on which to mount the specimen. Using this, I can move the specimen around using the wire. Finally, the specimen is surrounded by tracing paper made into a cylinder with two paperclips - and with cut-outs either side at the base to fit over the wire.
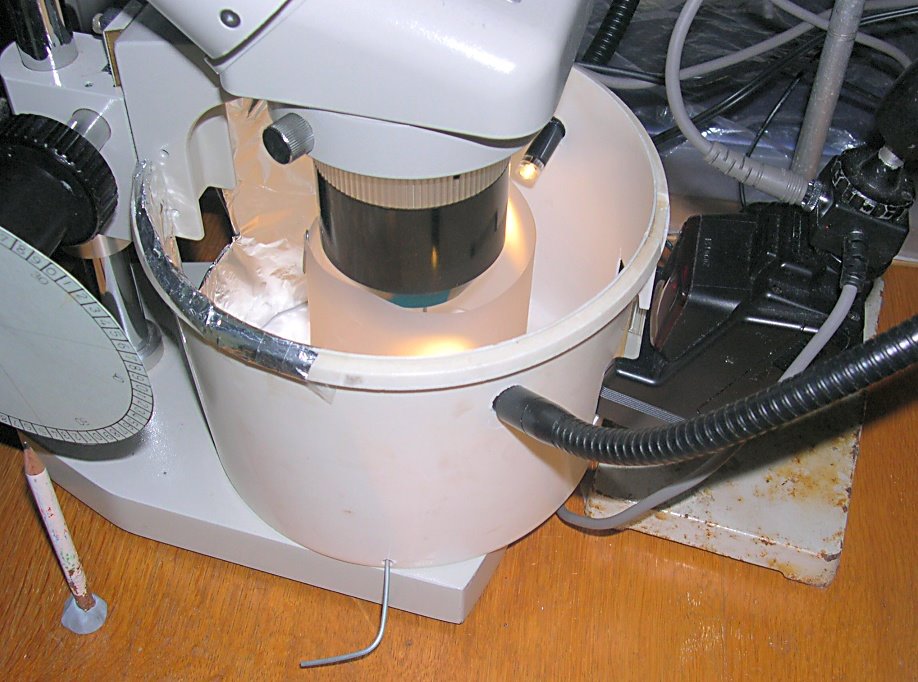
This seems to work quite well and achieves the diffuse, omni-directional lighting I was looking for. The main problem is setting up the specimen.
The best way seems to be to start by positioning the specimen as I want it under the microscope (without all the gear in the way!) on a small pice of plastazote. Then I place the whole thing - specimen and plastazote - on the piece of plastazote mounted on the wire in the middle of the diffuser. Then I put the whole diffuser set-up under the microscope and use a combination of moving the whole thing forward and backwards and sliding the plastazote sideways with the wire to centre the specimen in the field of view. Once properly positioned, the camera can be mounted and the sequence of photos taken.